With your pages built and website ready, it’s time to connect your site to Google so you can begin getting traffic for free.
This will be completed in three steps:
- Create and Set Up a Google Analytics account
- Create and Set Up Google Search Console
- Connecting your website/blog to Google Analytics and Search Console
It’s a fairly straightforward process after your 3rd time, lol
But don’t worry!
I’ll hold your hand each step of the way.
Ready?
Let’s dive in.
How to Set Up Google Analytics
Google Analytics is currently the best way to track your website’s traffic.
You need to install the Google Analytics script to discover data about your site’s performance, what page visitors enter your website on, how long visitors stay, etc.
A script is a programming code that performs functions on your website. In this case, the script will communicate to analytics what website visitors did on your site.
Warning:
If you are on WIX, you can not use the newer (released 10/2020) GA4 analytics property discussed below.

You will need to follow this tutorial instead to use the older version of Analytics on Wix.
Because of this and many other reasons, you should probably switch to WordPress and you can learn how to do that step by step in this guide. It’s more affordable as well 🙂
To get analytics set up, click here to go to the official homepage of Google Analytics, then click the “Set up for free button”.

Note:
You will need a Gmail account in order to use Google analytics, click here to create a google/gmail account if you don’t already have one.
After logging in you will begin to create your account. First, enter an account name, the name of your website or blog is a perfect account name.
Leave the other options selected and then click Next.

Under the property setup, enter your name again and change the “Reporting time zone” and “Currency” to match your location, then click “next.”

Next you will setup your “business information,” which doesn’t really affect anything, it is reporting data for Google more than anything useful for your website.
Click the “select one” under industry category then choose a category.
For a personal blog “People & Society” is appropriate, if you have a specific “business” or “niche” for your site, choose a category that most closely matches the description of your website.

Next, choose a “business size,” then select your best guesses of what you may use analytics for in the future. Again, none of this impacts anything for your user experience or traffic, just make selections to finish creating your account, and then click “create.”

Next, agree to the terms of service and data protection terms, then click “I accept.”

Next, choose what emails you wish to receive from Google, then click “save.”

After accepting or rejecting to receive emails, you should then land on the “Data Streams” tab in Analytics.
If not, click on “Data Stream” and then select “Web.”

Next, you will enter your website URL and name your stream, then click “create stream.”

Under “Tagging Instructions” select the arrow next to “Global Site Tag (gtag.js),” here you will receive the code for the analytics script.

Leave this tab open and next, you want to create your Google Search Console account!
How to Set Up Google Search Console
So you got your traffic tracker, analytics, now you need to start building traffic to track.
You need to let Google know that you have a website and it is live and on the web. That’s how you can get people to come to your website.
And this is called Google indexing.
Google Search Console is the tool you use to make sure Google indexes your website and that they populate your content to online searchers.
Additionally, Google Search Console is a crazy valuable “data” aggregate to help you increase the rankings of your pages and posts on your site.
I can’t encourage you enough to become best friends with this impactful tool!
With Google Analytics setup, when you use the same Gmail, activating Google Search Console should be a cinch.
Create a free account on Google Webmasters Tools.

Upon logging in, the page will look like this. Click ‘add property.’

Paste your entire websites URL in the “URL prefix” section and hit ‘continue.’

When you do this after linking your site to Analytics, Google verifies your ownership automatically because the email accounts are the same.

Next click on sitemaps, and leave this page up:
How to Add Google Analytics and Search Console to Your Site
The next steps will vary depending on the website CMS you are using, WIX, WordPress, Squarespace, etc.
I’m going to show how to add analytics and search console to WordPress because there is a specific plugin that is the top choice for WordPress users.
If you’re not on WordPress, the easiest way to learn how to add these Google tools to your CMS is by googling “add analytics to Squarespace,” and “add search console to Squarespace,” your CMS will have specific tutorials to walk you through the process.
I’m excited for you to knock it out, this foundation is the beginning steps to scaling traffic for your website.
How to Add Google Analytics and Search Console to WordPress
To add analytics and Search Console to WordPress go to your plugins and click add new, then search for Rank Math.

Click install and activate.
![]()
![]()
![]()
I already have Rank Math installed on other sites, and if I recall correctly, I think the first time you use Rank Math you are prompted to create a free account.
Create a free Rank Math, and follow the prompts to activate the account.
Mine just shows activate now, click to activate the account.
![]()
Choose the advanced option and click Start Wizard.
![]()
If you already have plugins that have SEO settings in them, Rank Math will find them and ask if you want to import these settings.
Choose all that are available in this screen and click “Start Import.”

Once the settings are grabbed, click continue.

Choose the “parent” category that best represents your website.

Based on your top level website category, you may be presented with additional fields, if so, choose the most relevant category in these fields.

The images chosen in this section may show on Google search results and Facebook shares.
By clicking “Add or Upload,” your Media Library will open, choose or create and upload an image that follows the current recommendations from Rank Math and once done, click continue.
![]()
Next up is setting up the Google connection, click the “Connect Google Services” button to begin.
![]()
Choose the Gmail account you used to create your Analytics and Search Console accounts,
![]()
Then click allow on the few grant permissions requests.

Confirm to Google you are allowing Rank Math this access.
![]()
Next select or confirm the appropriate search console and analytic properties you are connecting to your site and activate the “install analytics code” option.

Then click “save and continue.”
Next up is the Sitemap. The sitemap is an organization system web crawlers like Google use to discover the pages and posts on your website so they can index and rank them on their search results.
If not already activated, click the toggle to turn on the sitemap in Rank Math and choose what you want included in your sitemap and what you do not.
When considering to include or exclude pages, think about if the pages are useful for visitors to land on from a Google search or are they simply necessary for the practicality of your website?
Select and/or deselect types of content you want to include or exclude from your sitemap and click Save and Continue.

On the SEO Tweaks page, make sure “Noindex Empty Category and Tag Archives” is selected. This will help you to only have pages with information on them included in your search engine results.

Next click Setup Advanced Options.

On the Role Manager settings you can choose to add or remove SEO data from Rank Math to different users you allow into your website.
The default is typically solid though. Scroll down and click “Save and Continue.”

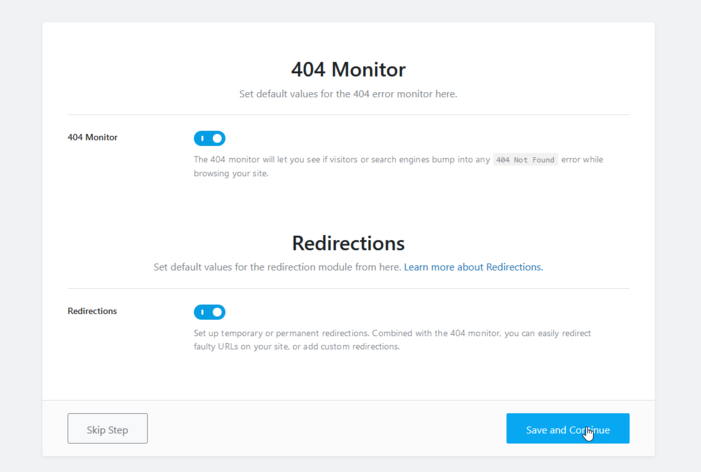
On the 404 Monitor screen, enable the 404 monitor and Redirections then click save and continue.
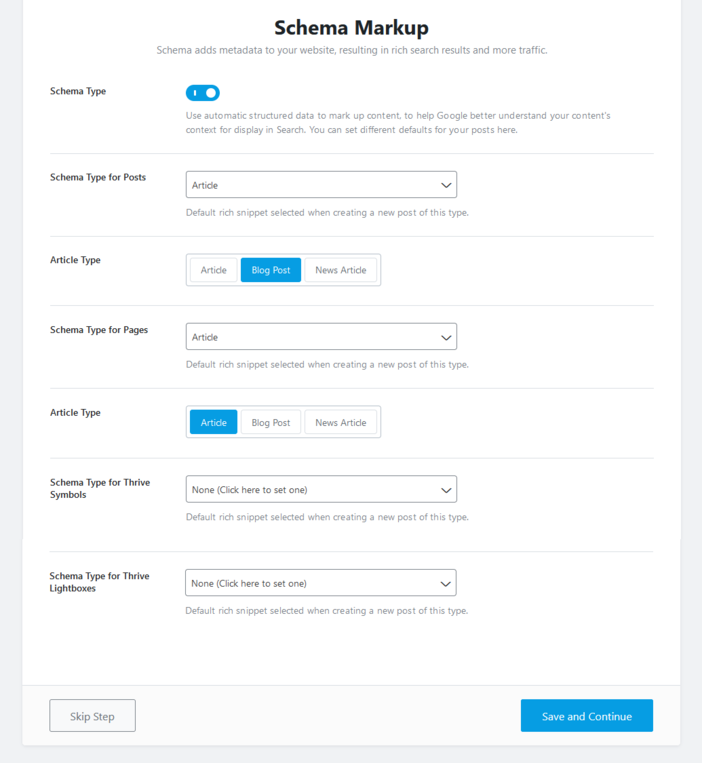
Next up is Schema:
Schema markup indicates to Google details about your content and is a deep topic.
“Marking up” your content entices Google to display additional information on Google Search Results which allows you to take up more real estate on Google with compelling previews that motivate searchers to click to your site.

You can change these settings on an individual page or post basis as you create and publish more content but you want this enabled and these basic settings established.
After clicking save and continue you will land on the RankMath dashboard. Scroll down to “Sitemap” and click settings.

Right click and copy the link to your sitemap.

Then go back to Search Console and click the Sitemaps tab.

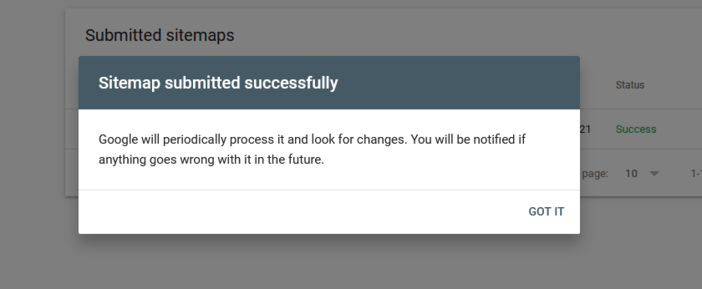
Paste in this link, deleting the duplicated website address so the URL appears in Google like it looks in Rank Math’s sitemap page and click submit.

After a few seconds you will receive a successful submission notification and done!
Google is aware of your website, analytics is connected and you’re ready to start growing your reach. Boom.
What to do Next
Depending on what you already have in motion here are a few ideas of what to do next after connecting your site to Google.
A necessary element to dial in is a lead capture system. This is done by setting up an email marketing platform and creating a landing page and other optin elements. You can establish those with Aweber for 100% free (up to 500 subscribers) here.
And if you haven’t already, start publishing blog posts, they are the safest and most impactful item you can do to begin crushing your SEO.
By your side in helping you grow your reach, make more money, and impact some lives!
Josh
